In this guide本指南目录
How text becomes a picture文字如何变成图像 Choosing a character set选择字符集 Density, invert & color密度、反相与彩色 Where ASCII shines字符肖像的最佳场景How text becomes a picture
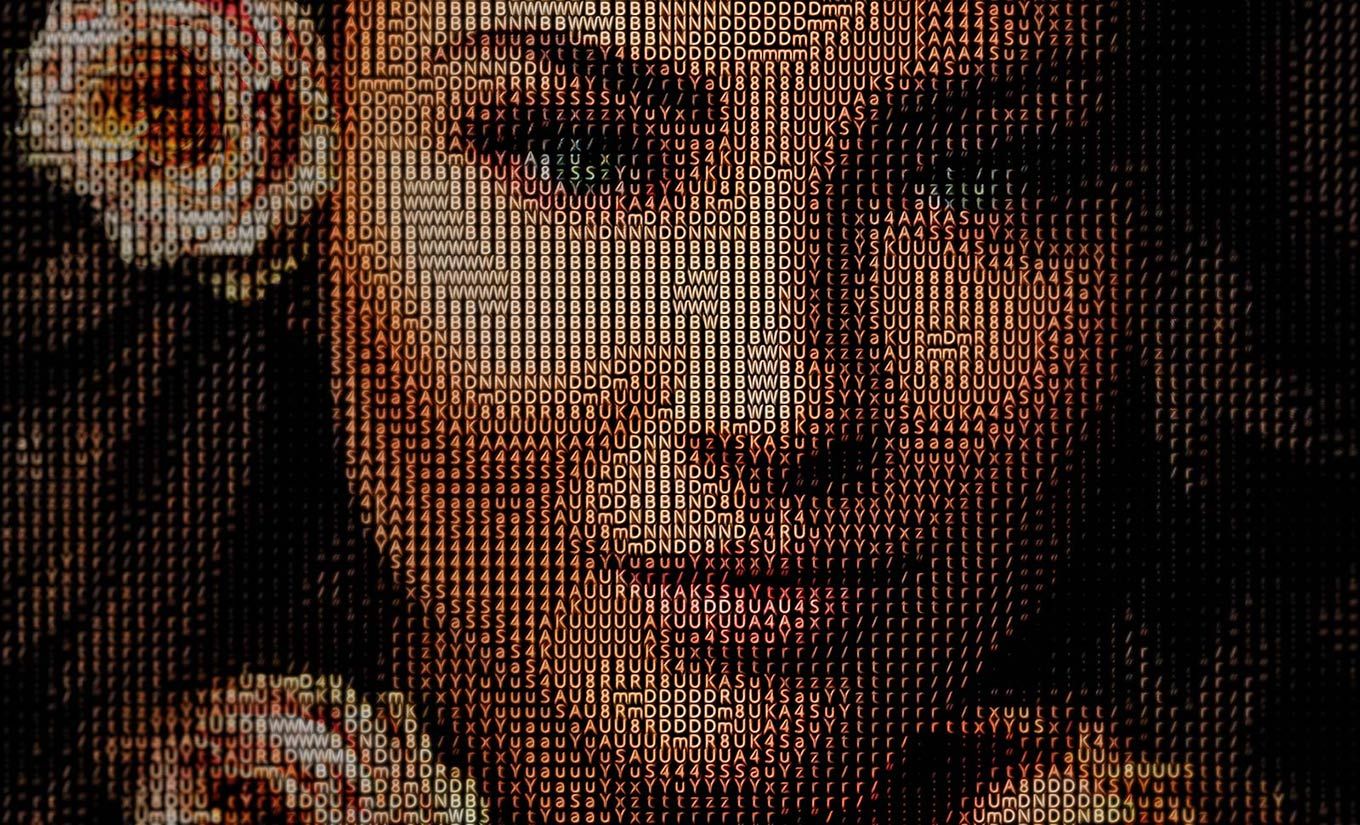
Long before screens could show photos, printers and terminals built images from characters. Each character has an apparent 'weight' — M and @ look dark and dense, while a period or a space looks light. By sampling your photo on a grid and mapping each cell's brightness to a character of matching weight, the text itself becomes the picture.
It sounds like a gimmick, but the effect is genuinely beautiful: view it small and the face snaps into focus; step closer and it dissolves into pure letterforms. That duality — image and text at once — is the whole charm.
Choosing a character set
- Classic — @%#*+=-:. — the original terminal ramp, balanced and readable.
- Blocks — █▓▒░ — solid, poster-like, closest to a real grayscale image.
- Detailed — the full 70+ character ramp for maximum tonal range.
- Minimal — #*:. — bold and graphic, great for badges.
If you plan to paste the result into a chat or a code block, the Classic set is your friend: it uses only ASCII characters that render identically everywhere.
Density, invert & color
Density sets the character size. Dense (1–2) keeps the portrait detailed — dozens of characters per face. Sparse (4–5) turns the same photo into a bold, abstract text block.
Invert flips the ramp for light-on-dark, which reads beautifully on dark mode feeds and terminals.
Colored samples the original pixel color for each character. It's less 'pure ASCII', but the result is a gorgeous poster that still reveals its text construction up close.
Tip for developers: export at HD, or copy the classic-set output into a Reddit code block — 70-80 chars wide is the sweet spot for readability.
Where ASCII shines
ASCII art has a cult following among developers, gamers, and retro-tech enthusiasts. It works for profile pictures that start conversations, for t-shirt prints at LAN parties, for terminal-style posters, and for any gift where the recipient 'gets the reference'.
It also pairs with Glitch and Pixel Art to make a full retro-tech set — three effects, one aesthetic family.
ASCII for developers
There is a special joy in pasting a portrait into a pull request comment or a terminal welcome message. For developers: use the Classic charset so every character is pure ASCII, keep width around 70–80 characters, and wrap the output in a code block. Inverted mode is your friend for dark terminals.
ASCII portraits also make memorable commit-signature art and README headers — a small, geeky personal brand.
Multicolor & gradients
Colored mode opens a second life for ASCII: the structure is text, but the color field makes it read like a mosaic poster. For gradient effects, choose a photo with smooth tonal transitions (a sunset, a portrait with rim light) so the color ramp shows. Dense spacing + colored mode + HD export is a striking combo for prints and phone wallpapers.
Troubleshooting
If the portrait looks illegible, the culprit is usually density: at sparse spacing, fine features vanish. Zoom in to check; if the eyes and mouth read at full size but not at preview, export at 2× and view at 100% — text art needs real pixels to shine. Also try swapping charsets: Blocks reads better for low-contrast photos, Classic for faces.
Frequently asked questions
Is ASCII art copyrighted? The arrangement of characters is generated from your photo, so the result is your own artwork. You can use it freely for posts, shirts, prints, or as part of software projects. The classic charsets themselves are in the public domain.
How do I paste it without breaking alignment? Use a monospace context: a code block on Reddit/GitHub, a <pre> tag on a webpage, or a plain-text editor set to a monospace font. Proportional fonts are the only thing that destroys ASCII art.
Can I animate it? Not in a single export, but you can generate a sequence of frames with slightly different densities and combine them into a GIF with any animation tool. The effect is striking — text that shimmers between readings.
Why does colored mode look different from classic? Colored mode keeps each character's original pixel color, so it reads like a mosaic poster; classic mode uses luminance only, so it reads like pure typography. Choose by mood: poster or terminal.
文字如何变成图像
早在屏幕能显示照片之前,打印机与终端就用字符构建图像。每个字符都有其「视觉重量」——M 和 @ 看起来深而密,句点和空格则轻而疏。在网格上采样照片,把每个格子的亮度映射到重量匹配的字符上,文字本身便成了图像。
听起来像噱头,但效果真的很美:远看时面孔清晰浮现;凑近则溶解为纯粹的字形。图像与文本同时存在——这种双重性正是全部魅力所在。
选择字符集
- 经典——@%#*+=-:.——最原始的终端梯度,均衡且易读。
- 方块——█▓▒░——实心、海报感强,最接近真实灰度图。
- 精细——超过 70 个字符的全梯度,色调范围最大。
- 极简——#*:.——大胆且图形化,适合徽章。
如果打算把结果粘贴进聊天或代码块,经典集是首选:它只用 ASCII 字符,在任何地方渲染都一致。
密度、反相与彩色
密度决定字符大小。密集(1–2)保持肖像细节——一张脸几十个字符;稀疏(4–5)把同一张照片变成大胆的抽象文本块。
反相翻转梯度,得到亮字暗底,在深色模式信息流与终端里格外好看。
彩色为每个字符采样原图像素颜色。它不那么「纯粹 ASCII」,但结果是华丽的海报,凑近看依然能发现其文本构造。
给开发者的提示:用高清导出;或把经典集输出粘进 Reddit 代码块——70–80 字符宽是阅读舒适区。
字符肖像的最佳场景
字符艺术在开发者、玩家与复古科技爱好者中拥有忠实拥趸。它适合能开启话题的头像、局域网派对 T 恤、终端风格海报,以及任何「对方能 get 到梗」的礼物。
它还能与故障、像素艺术搭配成整套复古科技风——三种效果,同一美学家族。
ASCII for developers
把肖像粘进 PR 评论或终端欢迎语,有一种特别的乐趣。给开发者:用经典字符集保证每个字符都是纯 ASCII,宽度保持在 70–80 字符,并用代码块包裹输出。深色终端请用反相模式。
字符肖像还能做令人印象深刻的提交签名艺术与 README 页头——一种小而极客的个人品牌。
Multicolor & gradients
彩色模式给字符艺术开启第二生命:结构是文本,但色彩场让它读起来像马赛克海报。要渐变效果,选择色调过渡平滑的照片(日落、带轮廓光的肖像),让色阶显现。密集间距+彩色模式+高清导出,是印刷与手机壁纸的惊艳组合。
Troubleshooting
如果肖像难以辨认,元凶通常是密度:间距稀疏时,精细五官会消失。放大检查;如果全尺寸下眼嘴可读而预览不可读,用 2× 导出并 100% 查看——文本艺术需要真实像素发光。还可以换字符集:低对比照片用方块集更清晰,人脸用经典集。
Frequently asked questions
字符艺术有版权吗?字符的排布由你的照片生成,结果是属于你自己的作品。你可以自由用于帖子、T 恤、印刷或软件项目。经典字符集本身属于公有领域。
粘贴时如何保持对齐?使用等宽环境:Reddit/GitHub 的代码块、网页里的 <pre> 标签,或设为等宽字体的纯文本编辑器。比例字体是唯一会毁掉字符艺术的东西。
能做动画吗?单次导出不行,但你可以用略有差异的密度生成帧序列,再用任意动画工具合成 GIF。效果很震撼——文字在不同读法间闪烁。
为什么彩色模式与经典不同?彩色模式保留每个字符的原像素颜色,读起来像马赛克海报;经典模式只用亮度,读起来像纯排版。按情绪选择:海报或终端。
Ready to try it yourself?想亲手试试吗?
Open the tools and turn your own photos into art — free, private, unlimited.
打开工具,把自己的照片变成艺术品——免费、私密、不限次数。