In this guide本指南目录
A short history一段简史 The three core techniques三大核心技术 Settings that matter关键参数 Where glitch belongs故障艺术适合哪里A short history
Glitch art began as an accident. In the 1960s, early video artists discovered that bending the horizontal hold on a CRT monitor produced strange, beautiful distortions. Decades later, the aesthetic jumped from hardware to software: corrupted JPEGs, broken GIFs, and datamoshed MP4s became a visual language for the digital age.
By the 2010s, RGB-split portraits and VHS-style overlays were everywhere — album covers, fashion editorials, TikTok transitions. The appeal is paradoxically simple: perfection is everywhere, so imperfection became the new luxury.
The three core techniques
1. RGB channel shift. A photo is three color channels. Slide the red channel a few pixels right and the blue channel a few pixels left, and every edge suddenly blooms with chromatic fringes — the signature glitch look.
2. Slice tearing. Cut horizontal bands of the image and shove them sideways. This mimics a corrupted video signal where frames get displaced mid-stream. Randomize the band positions and shifts for a unique result every time.
3. Noise blocks. Scatter small rectangles of static and random color across the frame, like the white noise of a dead channel. It sells the illusion that the image is barely holding together.
Real datamoshing corrupts the motion vectors of a video. Our still-photo version uses displacement and noise to fake the same energy — no video editing required.
Settings that matter
RGB Shift is the amount of channel separation. 10–20 is subtle; 40+ is violent. For portraits, stay under 30 so the face stays readable.
Slice Breaks controls how many torn bands appear. Zero gives a clean RGB-split look; 12–20 gives the full corrupted-feed chaos.
Random Seed reshuffles where the tears land. Same photo, same settings, different seed — different artwork. This is a fantastic trick for series work: one photo, twenty variations.
Where glitch belongs
Glitch is the poster child of Y2K revival and cyberpunk aesthetics. Use it for album art, stream overlays, festival posters, tech-brand content, and anything that wants to feel digital-native.
It also travels well on short-video platforms: a glitched portrait as a transition, a glitch reveal, or a before/after slider all perform strongly because the visual change is instant and unmistakable.
Reading a glitch image
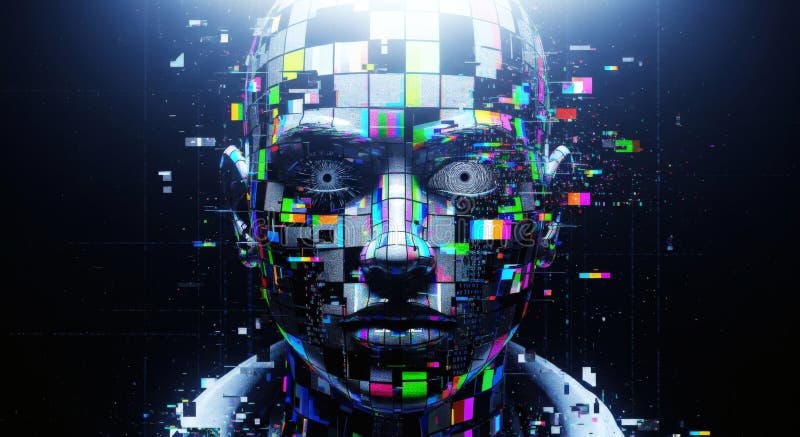
Glitch art rewards a second look. The eye first catches the broken frame; then it finds the face inside the fragments; then it notices how the RGB fringes trace the contours. That layered reading is what separates a good glitch from random corruption: it should still contain the original image, hidden inside the noise.
To achieve this, keep the source readable: moderate RGB shift, slices that displace rather than destroy, and noise blocks placed in the background rather than across the subject's face. The best glitch looks like the image is barely holding on — not gone.
Glitch in brand work
Tech, gaming and streetwear brands use glitch as shorthand for 'digital native'. The trick for professional use is restraint: pick one accent element (a logo, a headline, one product shot) and glitch only that, leaving the rest of the layout clean. Over-glitching an entire page reads as noise, not design.
Consistency matters too: define one glitch preset (shift amount, slice style, seed range) and reuse it across a campaign so the visual language stays recognizable.
Common mistakes
Three mistakes beginners make: cranking RGB shift to 60+ and losing the face; using tiny slice widths that read as scanlines instead of tears; and adding noise blocks over the subject's eyes. Each of these breaks readability, and readability is the entire game. Start subtle, increase gradually, and check the result at thumbnail size — if the person is still recognizable, you're in the safe zone.
Frequently asked questions
Is glitch art safe for my original photo? Completely. The original image is never modified — the effect renders a new canvas from it, and the original stays untouched in memory until you close the page. You can generate a hundred different glitches from one photo and the source is still intact.
What resolution should I export? For social media, 2× is more than enough and keeps file sizes small. For prints and posters, use 4×. Glitch's sharp chromatic edges actually survive downscaling well, so you have flexibility.
Can I recreate the exact same glitch twice? Yes — save the seed. The same photo, same settings and same seed reproduce the same layout pixel-for-pixel. This is the key feature for branded content that needs a consistent glitch style across a campaign.
Do I need a powerful computer? No. All effects run in the browser with plain JavaScript, and most photos process in under five seconds even on a mid-range phone. Large 4K sources take longer, which is why the HD export scales up from the original rather than processing a heavier canvas.
一段简史
故障艺术始于一场意外。20 世纪 60 年代,早期视频艺术家发现弯曲 CRT 显示器上的水平同步旋钮,会产生奇异而美丽的扭曲。几十年后,这种美学从硬件跳进了软件:损坏的 JPEG、破损的 GIF、datamosh 的 MP4 成为数字时代的视觉语言。
到 2010 年代,RGB 分离肖像与 VHS 风格叠加层无处不在——专辑封面、时尚大片、TikTok 转场。其吸引力悖论般地简单:完美无处不在,于是不完美成了新的奢侈品。
三大核心技术
1. RGB 通道偏移。一张照片由三个颜色通道构成。把红色通道向右滑动几个像素、蓝色通道向左滑动几个像素,每条边缘都会绽放出彩色条纹——这就是标志性的故障效果。
2. 切片撕裂。切出图像的水平条带并横向推挤。这模拟了视频信号损坏时画面在码流中位移的形态。随机化条带位置与偏移,每次都能得到独一无二的结果。
3. 噪点色块。在画面中散布小片静态噪点与随机色块,如同无信号频道的雪花。它让图像看起来岌岌可危、随时会崩坏。
真正的 datamosh 破坏的是视频的运动矢量。我们的静态照片版本用位移与噪点模拟同样的能量——无需任何视频剪辑。
关键参数
RGB 偏移是通道分离的程度。10–20 是微妙效果;40 以上则狂野。肖像建议保持在 30 以下,确保面部仍然可读。
切片撕裂控制撕裂条带的数量。0 得到干净的 RGB 分离效果;12–20 则是完整的信号崩溃混乱。
随机种子重新洗牌撕裂位置。同样的照片、同样的参数、不同的种子——不同的作品。这是系列创作的绝妙技巧:一张照片,二十种变体。
故障艺术适合哪里
故障是 Y2K 复兴与赛博朋克美学的代表。适合专辑封面、直播贴片、音乐节海报、科技品牌内容,以及任何想体现数字原生气质的场景。
它在短视频平台上也极具传播力:故障肖像转场、故障揭示、前后对比滑块——因为视觉变化即时且一目了然,天然适合快节奏信息流。
Reading a glitch image
故障艺术值得看第二眼。眼睛先捕捉破碎的画面;然后在碎片中找到那张脸;再注意到 RGB 条纹如何勾勒轮廓。这种分层阅读正是好故障与随机损坏的区别:它仍应包含隐藏于噪点之下的原图像。
要做到这一点,请保持源图可读:适度的 RGB 偏移、位移而非摧毁的切片、放在背景而非横跨面部的噪块。最好的故障看起来像是图像勉强支撑着——而非消失。
Glitch in brand work
科技、游戏与街头潮牌把故障用作「数字原生」的速记。专业用法的诀窍是克制:挑一个点缀元素(Logo、标题、一张产品图)只故障它,其余版面保持干净。整页过度故障读起来是噪音,而非设计。
一致性同样重要:定义一套故障预设(偏移量、切片风格、种子范围),在整场 campaign 中复用,让视觉语言保持可辨识。
Common mistakes
初学者常犯三个错误:把 RGB 偏移拉到 60+ 而失去面部;切片宽度太小,读起来像扫描线而非撕裂;把噪块放在主体眼睛上。这三个都会破坏可读性,而可读性就是全部。从微妙开始,逐步增强,并以缩略图尺寸检查结果——如果人依然可辨认,你就处于安全区。
Frequently asked questions
故障艺术会损坏我的原图吗?完全不会。原图永不被修改——效果从它渲染一个新画布,原图在内存中保持原样直到你关闭页面。你可以从一张照片生成一百种故障,源图依然完好。
该导出什么分辨率?社交媒体 2× 绰绰有余,文件也小。印刷与海报用 4×。故障的锐利色边其实很耐缩小,所以你有很大的灵活性。
能精确复现同一个故障效果吗?可以——保存种子。同样的照片、同样的参数与种子,会逐像素复现同一布局。这是品牌 campaign 需要统一故障风格时的关键功能。
需要强大的电脑吗?不需要。所有效果都靠纯 JavaScript 在浏览器运行,大多数照片即使在中端手机上也能五秒内处理完。4K 大图会更慢,所以高清导出从原图放大,而不是处理更重的画布。
Ready to try it yourself?想亲手试试吗?
Open the tools and turn your own photos into art — free, private, unlimited.
打开工具,把自己的照片变成艺术品——免费、私密、不限次数。